Essential
Travel Hacks
Travel Hacks
Travel hacks can help you save money, time, and stress, making your trips smoother and more enjoyable. Whether you’re a seasoned traveler or planning your first adventure, here are some essential travel hacks to elevate your experience:
1. Use Incognito Mode for Flight Searches

Why Use Incognito Mode?
When you search for flights online, websites may track your browsing history through cookies (small data files stored on your computer) to record what flights you’re viewing. In some cases, if you repeatedly search for the same flight route, airlines or booking websites may interpret this as a sign of high interest and could increase the price slightly, pushing you to make a quicker booking decision to avoid further price hikes. Using incognito mode can help you bypass this behavior.
How Incognito Mode Helps
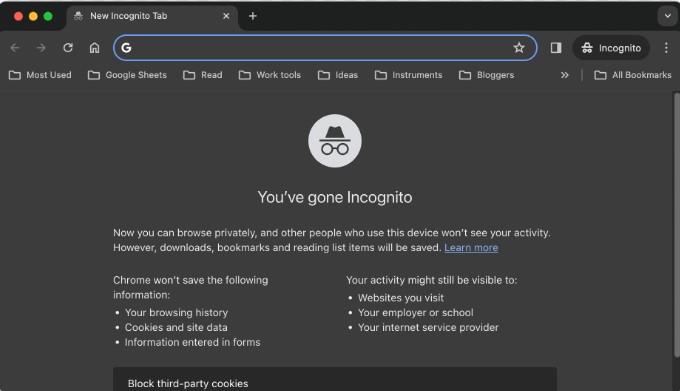
Incognito or private browsing mode prevents websites from storing cookies and browsing data. When you open a new incognito
Window and your browsing session start fresh without any stored data or history, meaning that websites can’t access your past searches. This gives you a “clean slate” every time you open a new incognito window, making it harder for booking sites to track your activity and potentially alter prices based on your search frequency.
How to Use Incognito Mode
Here’s a quick guide on using incognito mode for flight searches:
1. Open Incognito Mode:
In Chrome: Select the menu symbol with three dots in the top right corner then choose "New Incognito Window."
In Firefox: Select the menu containing three lines then navigate to "New Private Window."
In Safari: From the main menu select File followed by "New Private Window."
In Edge: Open the menu by clicking the three dots and select the option that says "New InPrivate Window."
2. Search for Flights: You should perform flight searches through your preferred search engine such as Skyscanner, Google Flights, or Kayak. Reset your session by opening each new search in an incognito window.
3. Compare Results: Your searches across different browsers remain private since price comparison works without interference from previous search data.
Additional Tips
Clear Cache and Cookies: Using an incognito window for searching requires clearing all browser cookies and cache for similar results.
Use Multiple Devices or Browsers: Different prices may be found by searching on separate devices with different browsers for comparison.
Set Price Alerts: Through Skyscanner, guests can establish flight price notifications for particular itineraries that work without demanding continuous searching.
The incognito mode gives privacy advantages but does not necessarily produce price discounts for flight booking. It remains a quick method to protect yourself from tracking systems that might hike fares. Frequent travelers will find this small basic maneuver useful as an addition to their existing fare-finding plans.
2. Pack a Portable Charger and Adapter

Portable Charger (Power Bank)
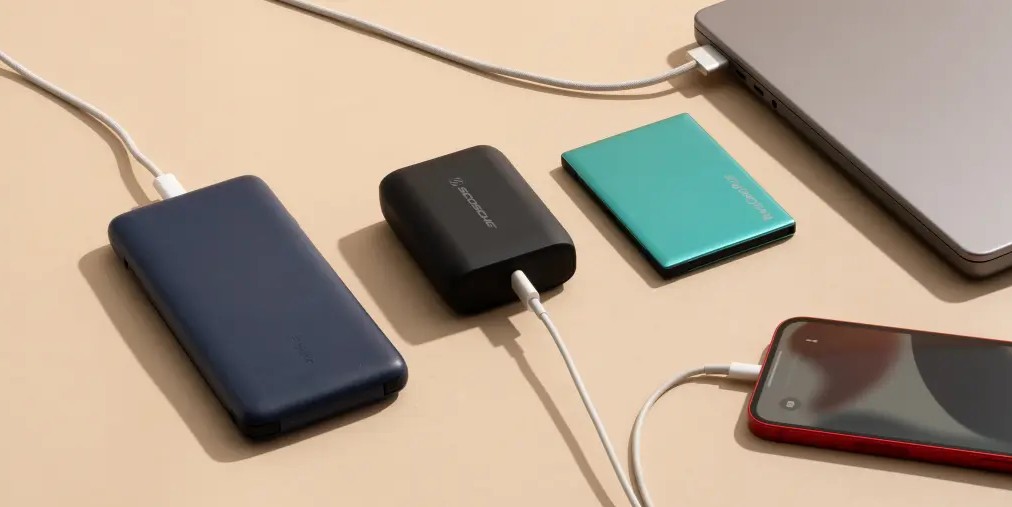
Why It’s Essential: Your phone battery will likely decline fast while traveling due to map usage coupled with booking confirmation examinations and language translation functions during long flights along with numerous stopovers and day trips. Whenever you need backup power you can rely on your portable charger to keep your devices ready to use and fully charged despite the difficulty finding open outlets.
Choosing the Right Portable Charger:
Capacity: You need portable chargers with at least 10,000 mAh capacity to charge your phone two full times. You should use a 20,000 mAh charger as it enables you to power your phone, tablet, and various other devices at once during extended trips.
Charging Speed: Fast-charging power banks bear the 'Fast Charge' or 'Power Delivery' indication to find them. Look for power banks that have either Quick Charge or Power Delivery certification so your devices can rapidly charge effectively. The latest power banks feature a high-speed charging interface known as USB-C.
Port Options: An intuitive power bank that features multiple output ports that enable parallel charging of your electronic devices when traveling with your phone laptop camera and tablet accessories.
Travel-Friendly Design: A power bank whose dimensions allow portability in bags and pockets should be your pick. When traveling by air check with your airline because some operators place limits on devices exceeding specific capacity thresholds for power banks.
Universal Travel Adapter
Why It’s Essential: You'll discover varying power outlet arrangements between different regions and end up without electricity when you discover your chargers require incompatible sockets. The universal travel adapter transforms your plug type to match local outlets enabling you to power your devices across different locations worldwide.
Choosing the Right Travel Adapter:
Compatibility: Choose a universal adapter that supports plug types A through G and I so you can use it across North America Europe Asia and Australia. Most universal adapters make it possible to switch plug types through easy buttons and sliding mechanisms.
Built-In USB Ports: Today's travel adapter models combine USB charging ports that support simultaneous device charging while eliminating the need to carry multiple adapter types. A built-in USB port on an adapter enables users to simultaneously charge their phone and tablet using a USB connection.
Voltage Converter: When using voltage converters you must install one for devices such as hairdryers and shavers whenever the local voltage differs from your country's standard. Modern phones and laptops come either with built-in dual-voltage adapters or need a voltage converter for international devices which requires double-checking device requirements before your departure.
Durability: Purchase adapters constructed using premium materials because these components sustain frequent plugging and unplugging sessions well. Swift portability is a major advantage since compact machine designs simplify your journey.
Benefits of Packing Both
Staying Connected: A portable charger allows constant connection even when your activities require you to navigate, make contacts, or snap photos during mobility.
Convenience: Having these items together keeps you free from charging restrictions across different power outlets during travel whether by airplane or bus or within busy lines.
Peace of Mind: Travel stress decreases while your ability to recharge anywhere frees you from accommodation concerns thus giving you peace of mind during any situation.
Portable chargers and universal travel adapters work together to create compact power solutions that eliminate travel stress and make your outings more convenient along with guaranteeing electrical security. Users can maintain constant electric connectivity and stay connected throughout their entire journey with these convenience tools which work in both urban areas and distant environments.
3. Roll, Don’t Fold, Your Clothes


1. Saves Space in Your Luggage
Maximizes Room: If you roll your clothes they contract into denser packages than if you fold your items traditionally. More travel items can fit into your suitcase or carry-on so you won't dedicate extra space to excess packing.
Better Organization: When packed in this style the items are arranged at specific angles which creates extensive compactness and neatness among your items. Your visibility into your belongings improves while transit risks for gear shifting are minimized when you roll your items instead of folding them.
2. Reduces Wrinkles
Gentler on Fabric: Compared to folding techniques rolling clothes maintain a smooth fabric surface without creating harsh creases as they turn into wrinkles.
into wrinkles. Workplace rolling techniques minimize fabric damage, particularly with cotton silk and linen fabrics which tend to wrinkle naturally.
Wrinkle Prevention: Protect your items from wrinkles by rolling the clothing with tissue paper inside and using protective garment bags within your roll. A protective barrier from tissue paper provides additional protection by reducing the destructive effect of material friction.
3. Easier to Access Your Items
Quick Access: Bundle your items into rolls to reach everything quickly without disturbing your packed items. The rolling method helps one-bag travelers and small carry-on users avoid annoying searches through their packed outfits.
Segmented Packing: Rolling lets you pair with packing cubes that enable you to arrange your possessions by categories. You can split your clothing groups with tops in one cube alongside bottoms and accessories in a separate cube. You can retrieve specific items easily because packing cubes organize your things by category. This prevents you from having to sort through everything in your bag.
4. Perfect for Various Clothing Types
Best for Casual Clothes: Rolling proves highly effective for clothing constructed from soft flexible materials such as T-shirts jeans leggings and exercise wear because these items can be tightly rolled without becoming disfigured. Herding your hoodies and your sweaters into rolled shapes helps create improved packing efficiency because they occupy less space.
Adapt for Formal Wear: Rolling your clothes remains suitable for everyday wear despite its possible limitations formal attire when done methodically will help minimize creases. For items that need to stay flat, consider using a hybrid approach: Place all folded items exactly on top of rolled clothing to help these objects keep their form.
How to Roll Clothes Effectively
Lay Flat: The first step for efficient rolling should begin with the flat placement of clothing items repeatedly until all wrinkles disappear.
Fold Slightly: Direct all segmented areas toward the inside of the garment until it takes a rectangular form.
Roll Tightly: Move the fabric along one edge while generating firm roll folds that prevent air bubbles from expanding the folded area.
Secure If Needed: When you need additional packing organization you can secure your rolled garments using elastic bands or small packing cubes.
Additional Benefits
Easy to Pack and Unpack: You can get the packing job done more efficiently by rolling items since the process avoids complicated fold techniques.
Improved Suitcase Balance: Thankfully by filling up all spaces using this method your luggage will have a balanced distribution of weight that stabilizes it during vertical positioning.
4. Carry a Reusable Water Bottle
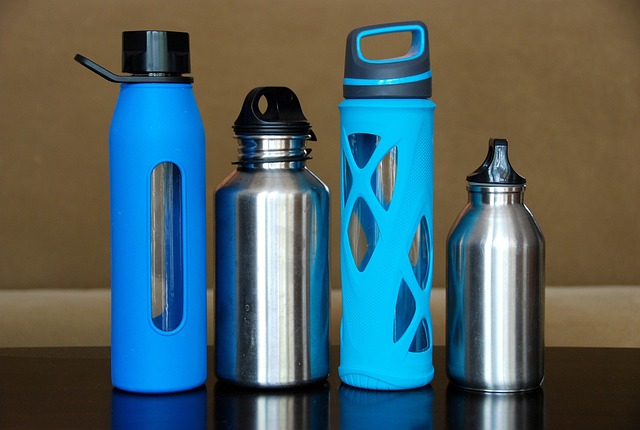

Having a reusable bottle while traveling creates both environmental and personal advantages for your journey. Your travel routine benefits in multiple ways including hydration maintenance and financial and waste reduction because of reusable bottles. Here’s why this travel essential should be on your packing list:
1. Stay Hydrated on the Go
Health and Comfort: Travel exposures including long journeys and flight times coupled with exposure to outdoor activities generate rapid dehydration in people. Your travel bottle allows simple and regular drinking to maintain energy levels reduce fatigue and let your body adjust to different altitude zones.
Easy Refills: Public venues including train stations and airports as well as hotels now provide water refill stations to keep your bottle filled for your journey. Having your reusable bottle lets you save money while choosing your hydration moments instead of buying drinks all the time.
2. Save Money
Cut Down on Bottled Water Costs: Acquiring purchased water each time you need it throughout your journey will empty your wallet significantly particularly in expensive tourist hotspots.
The prices for bottled water reach high levels within airport terminals along with tourist hotspots. Refilling your reusable water bottle daily throughout your trip will reduce your expenses for drinks which builds up significant savings toward your travel costs.
More Freedom to Explore: Handling water independently gives you exploratory freedom because you don't need to stop your journey to look for stores or machines selling beverages.
3. Reduce Plastic Waste
Eco-Friendly Choice: Single-use water bottles along with other plastic items form substantial amounts of waste produced by the travel industry. A reusable bottle becomes an essential tool to preserve the environment while decreasing plastic pollution levels specifically in overvisited tourist destinations struggling to assess their waste problems.
Support Sustainable Travel: Tourism-generated waste strongly impacts many natural sites alongside other destinations. By using a reusable water bottle daily you enhance your environmental sustainability during travel while protecting all touristic areas.
4. Convenience and Versatility
Temperature Control: Insulated designs of reusable bottles maintain an ideal temperature for drinks whether users want cold or hot beverages throughout several hours. Travelers benefit from insulated bottles because they allow for cold beverages in hot areas alongside hot drinks in colder weather.
Multi-Use: This rugged bottle functions with multiple hot and cold beverages so plan your beverage choices easily. The container serves as vital backup storage that lets you keep food items and small items along with water during travel emergencies.
5. Safety and Hygiene
Filtered Options for Safe Drinking: Built-in filters are included in particular reusable water bottles making them useful when traveling to places where tap water safety cannot be confirmed. Water filters inside bottles create safe drinking conditions which expands drinking possibilities.
Personal Hygiene: Your water bottle serves dual purposes as an unrelated drinking vessel that reduces disease transmission during crowded airport and train journeys.
Optimize your reusable bottle usage while traveling
Refill at Every Stop: Preserve water by filling your bottle whenever you visit airports cafes hotels or parks that have refill stations.
Carry It with You: Always carry your reusable bottle as one of your travel basics because it is just as important as your phone and your wallet.
Join Local Initiatives: Tourist areas and Refill and Tap applications provide “refill stations” showing cost-free locations to top up your bottle. The usage of these resources enables destinations to locally assist in their fight against plastic waste.
Putting reusable bottles in your travel kit benefits both your health and your finances and helps protect the environment. Traveling with a reusable water bottle provides simple comfort alongside budget benefits and helps make your journey more sustainable. Every type of vacation contains travel moments where a reusable drink container assists the modern adventurer.
5. Download Maps Offline
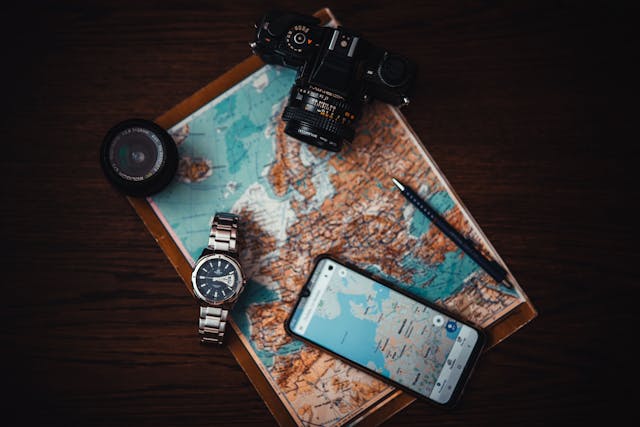

The savviest and most practical tip for exploration in unknown territory includes using downloaded maps offline. The benefit of offline maps stored on your device enables navigation without requiring internet access thereby saving you time while reducing anxiety and improving your safety. Here’s why it’s essential and how to make the most of it:
1. Navigate Without Internet Access
Perfect for Remote Locations: Reliable internet access tends to be scarce across multiple scenic destination types in both national parks and places that stay off main travel paths. You can explore confidently because offline maps let you navigate places where Wi-Fi and cell service do not exist.
No Roaming Charges: The cost of using data services in foreign locations tends to be high. When using offline maps during your international trip you can explore region-wide without facing international roaming expenses which provides economical accessibility to travelers.
2. Save Battery Life
Conserve Phone Power: Users can access maps through GPS and internet connection
The constant use of map applications through your phone decimates battery life while you search for directions. Your phone juice stays stronger using offline maps since these don't need internet access which preserves battery energy for vital tasks like calling or taking images during your daily activities.
3. Improved Safety and Convenience
Stay Oriented: Going astray within unfamiliar locations becomes more stressful because communication obstacles prevent you from getting assistance. Offline maps become invaluable because they help you return to your accommodation while showing nearby landmarks and helping you locate emergency services if necessary.
Travel with Confidence: Online printed maps keep you oriented with precise instructions which offers you confidence regardless of your lack of knowledge of local signage or foreign language fluency.
4. Discover Points of Interest
Local Recommendations: Popular tourist sites and restaurants together with shops mark the maps within various interactive navigation systems. Even without a proper data connection, you can view specific locations on your offline maps along with local activities which help you decide what to visit.
Plan Your Day: The capability to access maps offline enables route planning for different attractions which both saves time and helps you find your must-see destinations throughout their sequence of locations.
5. Adapt to Changing Plans
Flexible Navigation: You can modify your itinerary and switch directions using offline maps because you won't lose your way. проблема про себе не беспокоит так как ты можешь использовать offline maps для нового районного исследования илиokemoncovery of secret beaches.
How to Download Maps Offline
Most popular map applications, including Google Maps and Maps.me, make it easy to download maps for offline use:
Google Maps:
First, open the Google Maps application found on your phone.
Begin your search for the city or region which will be your destination.
From the map interface select Download and navigate to Offline Maps Settings in the app to choose your specific area of interest.
Post-download access lets you explore the map wherever you are without requiring internet access. When offline Google Maps will show you the routes as normal.
Users must download the Maps.me app and then search for their destination location.
You need to choose where the maps will be downloaded before offline usage.
Through user-generated contributions, Maps.me provides localized recommendations for things to see as well as eat and do while offline.
Additional Tips for Using Offline Maps
Update Before Your Trip: When traveling you should update your offline map content before departure because outdated data can affect your knowledge of roads and transportation options alongside points of interest areas.
Download Larger Areas: When planning journeys longer than usual it's better to download entire regional maps instead of focusing on single urban areas. The expanded map area delivers higher visibility for free movement while avoiding download requirements.
Use GPS Sparingly: When using GPS for navigation your device's battery life can decrease yet offline maps still function without connections to the internet so always keep a portable charger handy when extensive navigation will be required.
Benefits Beyond Navigation
The use of offline maps provides more than simple route guidance since you can enhance your travel independence through stronger personal confidence. Your downloaded maps enable you to maintain flexibility when you need them as well as make quick decisions but free you from considerations about finding Wi-Fi hotspots. A physical map enables you to concentrate on your journey of exploration without worrying about data interruptions.
Making offline map downloads is an easy method that generates exceptional advantages for navigation. This convenient approach enables safer and seamless journeys across all your travel destinations through practical offline navigation.
6. Scan Important Documents


Using document scanning as a precaution before traveling saves you from catastrophic situations when you lose or have your original documents stolen. Keeping digital versions of essential documents on your smartphone or tablet or trusted cloud storage will offer safety assurance with the bonus of convenient information verification during your journey. Easy Information Retrieval Becomes Possible Through Scanningvel is a smart precaution that can save you from major headaches if your originals are lost or stolen. Having digital backups of key documents on your phone, tablet, or secure cloud storage provides peace of mind and can simplify replacing or verifying your information while on the road. Here’s why scanning is essential and what documents to focus on:
1. Ensures Easy Access to Important Information
Quick Retrieval: By keeping digital versions of your essential files you can access your information immediately during any needed time. You'll access vital information anytime at hotel check-ins and embassies and when passing through airports because of your pre-scanned documentation.
Minimize Hassle: Scanned documents become essential during replacement procedures when you lose items such as your passport or wallet. Authorities now recognize digital submissions during verification steps because it simplifies both ID and address authentication.
2. Increases Security and Peace of Mind
Backup for Emergencies: Digital copies serve as essential market backup to protect you against theft and also preserve your files in case of loss and damage. The safety net provides prompt response capabilities so you can prevent delayed situation resolutions.
Avoid Carrying Sensitive Originals: Digital copies of select documents such as birth certificates and insurance documents serve as a safe alternative when you do not require these originals during daily activities thus you can store them securely at home.
3. Useful for Language Barriers
Translations Ready: Students who travel to areas where English is subordinate often benefit from scanning their crucial documents with local translations. Documents translated into local language support interactions with important places such as law enforcement as well as service providers.
4. What to Scan
Passport: You need to scan the photo page together with the visa pages from the countries you want to visit. Your passport stands as your primary travel document so having backup documents for emergencies can be very important.
Travel Insurance: Check for all necessary information on your travel insurance policy including emergency contact numbers by doing a digital scan. Your travel preparations will become easier when you store necessary details for medical assistance and abroad encounters near to instant access.
Driver’s License or ID Card: An electronic version of your driving license helps you get access to rented vehicles or lets you establish your identity when booking hotels or renting equipment.
Flight and Hotel Confirmations: Apart from digital confirmations stored on devices there is value in keeping scanned version backups because app malfunctions flawed Wi-Fi connections and lost bookings could occur.
Itineraries and Reservations: Keeping digital versions of your travel itineraries and reservation numbers alongside each other maintains efficient organization when you need to take different combinations of flights trains or buses.
Vaccination and Health Records: People must still present vaccination documentation to enter several nations worldwide. To show your vaccination card or health certificate when required it is convenient to keep a scanned version of the documents in your possession.
5. Where to Store Digital Copies
Secure Cloud Storage: The cloud storage services Google Drive, iCloud, and Dropbox deliver secure online storage space for your documents. Internet access enables you to view files through cloud storage from any computing device and provides backup in case your device suffers damage or gets lost.
Email a Copy to Yourself: People can enhance security by sending emailed copies of their scanned documents to their inbox. Add specific file labels to your inbox for quick identification needs during emergencies.
Save Locally on Your Device: Particularly helpful though cloud storage is, that saving your important documents directly on your phone or tablet enables offline document access even during internet absentia. Securityblanketed password-protected files or notes are easily stored within numerous note-taking apps alongside file managers.
Use a Document Management App: With Evernote Adobe Scan and CamScanner users can handle and guard important documents while maintaining organization under one system. More than half of these applications let users shield their data through encryption features combined with password control measures.
6. Additional Tips for Secure Scanning
Password Protect Files: Secure your scanned files through two protected methods – set up passwords to protected files or establish PIN or fingerprint authentication on desired apps for access authorization.
Use Secure Connections: Scan files only through secure WiFi networks to prevent hacking attacks on your data. Public connection points are unsafe for these purposes.
Update Files Regularly: Replacement of all expired or outdated documentation requires the use of current versions. An updated file system prevents confusion and travel complications between sessions.
Benefits of Scanning Important Documents
Transporting scanned copies of important documents guarantees security as well as convenience and peace of mind so you can maintain higher travel confidence. середовиolumes up unexpected events through digital duplicates making it possible to prove your identity and replace stolen belongings or continue your travel unhindered.
The easy act of scanning your travel documents ensures trip safety alongside stress reduction which lets you truly enjoy your journey knowing you're prepared for everything.
7. Get a Local SIM or eSIM
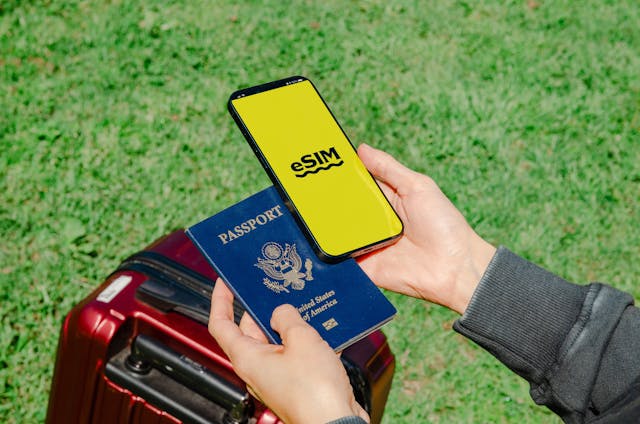

Tourists should buy local SIM or eSIM cards from their destination countries because these cards allow them to connect while reducing their roaming expenses. While exploring a new city for bookings or communication needs a local SIM or eSIM gives you secure network access and stable connectivity. Here’s what you need to know about both options and how they can enhance your travel experience:
1. Stay Connected Affordably
Avoid High Roaming Charges: The cost of using your device with international roaming often becomes excessive when your data consumption levels are high. Connecting with a local SIM or eSIM through the region's networks gives international travelers extremely affordable access to local data services and phone/call services.
Cost-Effective Data Plans: Plenty of communication companies operating locally provide inexpensive prepaid plans that deliver ample data resources. When you select this plan you get coverage without surprise bills while you choose data coverage that suits your requirements exactly.
2. Enjoy Reliable and Fast Connectivity
Access Local Networks: Commanding telecommunications services using local SIM or eSIM allows network connections in the area. Mobile networks in the region deliver usually better speeds and reliability than standard roaming connections. The On-the-Go translation feature serves as an excellent tool for interacting with navigation applications and for both restaurant discovery and conversion needs during your journey.
Better Signal Coverage: Public cellular operators in numerous regions offer superior network performance to their international roaming counterparts particularly where international providers struggle to provide coverage in rural locations. Having a local SIM phone delivers stronger reception signals which lets you remain connected throughout distant areas.
3. Convenience for Frequent Travelers
eSIMs for Hassle-Free Setup: ESIM technology works as a virtual SIM which eliminates physical changes especially beneficial for people who relocate often. With an eSIM profile, you can access multiple carrier networks on your single device by establishing plans without requiring the removal of your native SIM card.
Avoid SIM Swaps: Thanks to eSIM you don't need hardware card swaps while still having the flexibility to keep using your original phone number for both voice and text messages depending on your device's dual SIM functions.
4. Freedom to Explore Without Worry
Navigation and Translation: Users with affordable data access can now benefit from fast updates of real-time maps travel guides and transportation directions through their translation apps when exploring new cities independently. The instant availability of data lets you confidently explore without hesitation because it provides you with direction-finding assistance while offering you recommendations.
Stay Connected with Locals: People need to use a local number to book restaurant reservations and ride-hailing services or join tours. The ability to use a local SIM functions as a convenient solution for booking local services while letting you fully connect with authentic travel opportunities.
8. Use a VPN for Booking


Travelers who use VPNs as Virtual Private Networks to book reservations both minimize expenses and safeguard privacy while accessing restricted discounts based on location. Your travel rate and data protection can improve significantly when you use a VPN for booking travel accommodations because travel websites adjust prices based on your location and website behavior. The following text explains why and how VPN services enhance your travel booking process.
1. Virtual locations provided through VPN services enable customers to connect to different regions to find reduced prices.
Tourists who use Virtual Private Networks can benefit from regional price variation on websites that employ dynamic pricing systems based on user location. Through a VPN you can alter virtual positions to check prices as though you were based in different nations. A booking made from a region with lower cost averages has been known to get people better rates.
The use of a VPN allows users to switch between countries by repeatedly choosing different virtual locations until they identify a booking destination that yields lower prices.
Escaping your home location and moving to where the airline operates (same as their home country) may deliver lower ticket prices. Such a method allows better price control to compare rates between multiple booking sites.
2. Surveillance mechanisms and tracking technologies cause price increases to be prevented by using VPN services
Booking sites apply tracking tools alongside cookies to increase prices on products after customers review their websites multiple times. Your travel website determines higher rates by observing multiple searches for one flight or hotel since they use this pattern as a way to create artificial urgency. VPN use enables users to hide their price browsing history which stops price hikes from occurring.
The activation of a VPN creates anonymous browsing and data protection so websites become less likely to recognize repeated users and adjust their prices in return.
3. Access Region-Exclusive Deals and Content
Specific websites provide location-based discounts that become accessible when you connect with a VPN at specified regions or countries. By using a VPN you gain access to exclusive deals which other customers would normally not see in their usual home location.
Locations can lead booking sites to apply limitations to their content and options. Travel providers show different package ranges to users from the United States and users from European regions. VPN services enable users to see more booking alternatives which allow better customization of their travel arrangements according to their specific financial needs and requirements.
4. Enhanced Security for Online Transactions
Internet safety is protected by VPN encryption which secures sensitive information such as credit card numbers and personal data when you book online through public Wi-Fi networks in various locations.
The risk of identity theft decreases when using a VPN to browse various networks that may have security vulnerabilities. When you connect to a VPN system it encrypts your personal information and financial data particularly crucial during the booking process of flights or hotels.
How to Use a VPN for Booking Travel
Select One of Various Trained VPN Providers from Either the Free or Paid Categories. Corporate VPN services NordVPN and ExpressVPN together with CyberGhost provide top-level security and speed in addition to country selection abilities which free VPNs cannot match.
Users should choose their VPN connection location first before accessing the booking website. Test different geographical locations since the booking rates vary substantially based on regional aspects.
Before conducting new searches users should empty their browser cookies and cache contents to prevent digital information from affecting price results.
Check different virtual locations before you examine the prices. Users can use the activated VPN location to advance book their travel when they detect better pricing in another geographical area.
Tips for Effective VPN Use in Travel Booking
Every test run with multiple browsers through a VPN connection following cookie/cache deletion may lead to unveiling extra pricing options according to certain travelers.
Look for Additional Security Features: Choose VPNs with features like a "kill switch" (which cuts off your internet if the VPN connection drops) and strong encryption for added safety.
Select a VPN that provides fast servers with proven reliability since both elements can influence your booking process.
Common Scenarios Where a VPN Helps
The prices of international flight reservations differ significantly depending on which region you access from. You can find the best purchase prices for travel by checking different regions through a Virtual Private Network connection.
The costs of accommodation in hotels frequently decrease when users connect from particular countries across the world. Virtual Private Network testing enables users to discover price discounts hidden from one location to another.
When using a virtual private network users can check vehicle rental offers between nations to locate the most beneficial rate. It's your text here...
Benefits of Using a VPN for Travel Booking
When you have a VPN it becomes possible to both control costs when booking and stay secure by ensuring data privacy while accessing many different available travel deals. Your data security coupled with using a VPN can produce large cost savings on travel expenses even though this simple method is just a small step. Travelers who want to find the ideal travel packages alongside secure access to booking websites should use a VPN as their smart booking solution.
9. Use Google Translate Camera


The Google Translate camera function operates as a strong travel accessory to overcome language obstacles through smartphone camera-based real-time text translations. The feature proves most beneficial in nations where your language knowledge is insufficient because it provides quick translations of street signs and menus as well as maps. The Google Translate camera stands as a vital tool for travelers because this guide includes both usage examples and practical advice for obtaining maximum benefits.
1. Instant Translation of Text Around You
You can use your camera to read signs in all environments including station platforms and airports and urban streets which automatically displays their meaning through instant translation.
Aside from helping you read signs the Google Translate camera enables effortless translation of dining descriptions that appear on your food labels. The feature enables users to examine product information in retail facilities in order to take well-informed buying decisions.
You can use your camera to translate both tickets and hotel forms and other essential documents making it possible to perform necessary tasks independently.
2. Supports Over 100 Languages
The Google Translate application enables translation for more than 100 languages which provides language access during traveling through various regions worldwide.
The application provides two translation modes for users to select Instant Mode for direct text display on images or to use Scan Mode for targeted section translation.
3. Offline Translation for Remote Areas
Application users can download language files for offline usage to use in remote locations when access to the internet becomes limited. The application ensures continuous translation capabilities through downloaded languages for offline use so you can translate without requiring Wi-Fi or cellular data.
The capability for offline usage enables independent travel in locations that have few English-speaking residents thus improving your trip in these areas.
4. Promotes Cultural Immersion and Confidence
Through the Google Translate camera users experience increased confidence when they explore local neighborhoods and markets as well as public spaces. Accessing signs and labels and following instructions will be possible without assistance from others in deciphering them.
Technology translation tools create more comfort when you communicate with native people in foreign areas. The translation features of the app enable you to use it for expression changes during language exchanges thus improving the process of conversation and enjoyment.
How to Use Google Translate Camera
Install the Google Translate program by opening the app from your smartphone either through iOS or Android platforms.
The camera icon located on the home screen starts the camera functionality that allows users to point at translation text.
Your Translating Languages: Pick which languages need translation (X to Y) from the options available. Before going offline you need to have all required language packs downloaded for the translation.
Point and Translate: Hover the camera over the text. An instant translation of the original text automatically appears on the image through Google Translate. The Scan or Import modes serve to translate larger or more complicated texts when using the Translate app.
Additional Tips for Effective Use
Clear Lighting: The Google Translate camera works best with clear, well-lit text. Read the text carefully so that both shadows and reflections do not obstruct it because this ensures optimal translation accuracy.
Download Key Languages Before You Go: If you know you’ll be traveling in areas without consistent Wi-Fi, download languages in advance. By doing this preparation beforehand you will achieve the ability to translate text in offline situations.
Use Scan Mode for Precision: Instant translation can sometimes be less accurate for longer text. For detailed translations, use the “Scan” option, which lets you highlight specific parts of the text for clearer and more reliable results.
Try Different Angles: If the app has difficulty recognizing words, try adjusting the camera angle or moving slightly closer to the text for better results.
Real-World Uses for Google Translate Camera
Navigating Public Transit: Easily read signs at train stations, bus stops, and airports to ensure you’re on the right route and understand boarding procedures.
Shopping and Dining: Use it in stores to read product labels or in restaurants to understand menu options, making it easier to try local foods confidently.
Understanding Historical Sites:: Translate information boards at historical or cultural sites to gain a deeper understanding of local history and significance without needing a tour guide.
Emergency Situations: If you find yourself in an emergency or needing medical help, use the Google Translate camera to read signs or fill out forms accurately.
Benefits of Google Translate Camera for Travelers
Users can enjoy easier navigation of foreign languages thanks to Google Translate camera features which enhance their feeling of independence when traveling abroad. The tool enables users to grasp their new settings along with making suitable choices which results in wholehearted engagement of unfamiliar surroundings without language conflicts. The application serves as a required tool for globe-trotters because it enables them to experience foreign destinations with increased ease and immersion.
10. Wear Your Heaviest Items
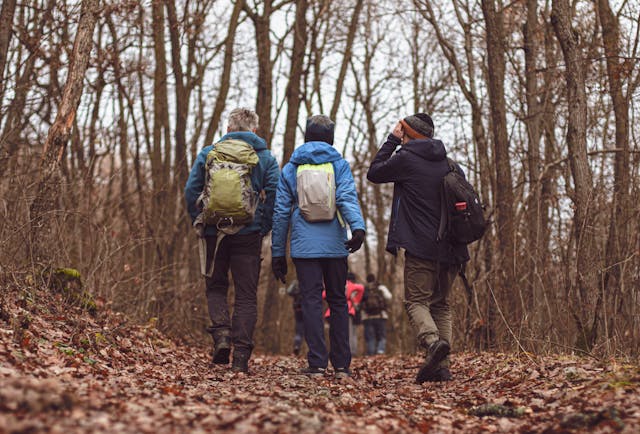

Travelers who wear their bulkiest clothes and accessories before their trip find multiple advantages since this method reduces their suitcase size and overall baggage weight hence preventing additional fees. You can reduce your luggage size while keeping vital items by wearing your bulkiest garments such as boots and jackets along with jeans. The travel benefit system along with its real-world application will be explored throughout this text.
1. The weight of your luggage should be reduced
Passengers who want to carry their bags onto flights need to follow the rigid weight restrictions because airlines charge additional costs for heavy luggage. Wearing heavy items as layers lets you pack more needed items while avoiding weight-related fees.
Your possession capacity increases during travel when you keep your luggage light-weight because you can bring home local products tourist items and unique items. Your suitcase will become less restricted because wearing your bulky items will give you more space to pack freely.
2. Passengers who wear warm clothing during flights will remain comfortable throughout their journey.
The cold temperatures inside planes can be managed with the help of an additional sweater or jacket. Comfortable during the journey. Airlines prohibit carrying items that exceed carry-on size restrictions so be sure your jacket folds right into a small pocket where it can easily fit on the plane when you need it.
The bulk of certain clothing items convert into soft padding that offers extra seat comfort during extended travels through buses and trains when standard seating options lack ideal support.
3. Travel Light and Efficiently
Traveling with heavier clothing pieces inside your luggage costs fewer packing complications because they take up less space for items that would otherwise require separate bags or personal portage weight.
Staffing makes travel boxes simpler because you carry boots and coats instead of packing them thus freeing up space to focus on crucial travel supplies.
Tips for Wearing Your Heaviest Items Comfortably
Layer Strategically: If you’re wearing heavier items, layering them strategically can prevent discomfort. Arrange your wardrobe with a T-shirt first then a sweater and finally a jacket on top. You should remove excess layers through heat generation using this technique particularly when waiting at transportation hubs.
Wear Your Boots or Heaviest Shoes: Shoes are often the heaviest items travelers pack. Wear your hiking boots or equivalent footwear during transportation days because this action creates extra space in your luggage.
Choose Multi-Functional Clothing: Look for clothes that are not only heavier but also versatile. The durable pocketed jacket functions as insulation but its multiple compartments create sufficient storage for a phone and wallet as well as a passport.
Use Jacket Pockets for Small Essentials: Many jackets, especially travel-friendly ones, have extra pockets. Put your chargers sunglasses and snacks along with other small heavy items into your coat pockets to obtain additional cargo capacity and keep bulk from your travel case.
Loosen Up Once on Board: If you’re wearing several layers or bulky items for a flight, take them off once you’re seated. Having such items stored safely inside the overhead compartment or under your seat provides better travel comfort throughout the journey.
Heavy clothing items should be worn for their optimal effect during particular occasions.
Cold Destinations: For trips to colder climates, you’re likely to bring warm, heavy clothing anyway. Precariously transporting clothing items on your traveling day will help you adapt to local environments.
Hiking or Adventure Trips: When you need rugged gear like hiking boots, wear them during transit to avoid carrying the added weight in your bag.
Budget Airlines or Strict Weight Limits: Many budget airlines have low baggage weight limits and may charge high fees for even small overages. The policy limits you have to follow become easier to satisfy by wearing your biggest clothing pieces so you save money on additional costs.
Benefits of Wearing Your Heaviest Items for Travelers
Travelers who distribute their maximum weight among their outfits will reduce their baggage weight and save costs in airline fees. The simple strategy of switching your heavy travel clothes through your outfit can create additional room for meaningful travel items beyond costly fees. This approach allows travelers to achieve smart and comfortable travel while keeping their most important items without spending extra funds.
